Authentik is open source and self-hostable. Read how SSO fits together first if you have not — this page is only the Authentik-specific half.
It splits the client into two objects — a provider and an application — and the provider defaults to confidential, so you will have a client secret to store by default. Its grant-type defaults are also worth trimming, covered at the end.
Create the provider
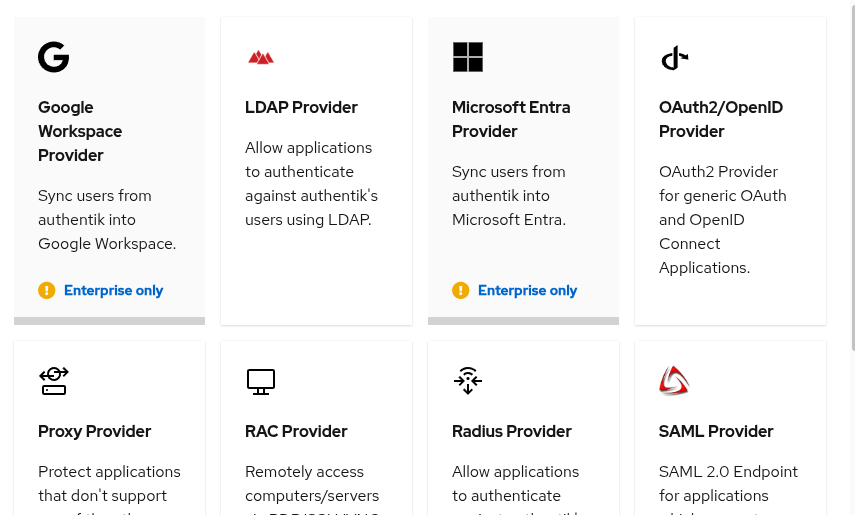
Applications → Providers → Create, then choose OAuth2/OpenID Provider from the type list:
For Authorization flow, either default works:
default-provider-authorization-implicit-consent signs users straight in,
while the -explicit-consent variant adds a one-time “Authorize Application”
prompt.
Under Protocol settings, leave Client Type at Confidential and copy both the generated Client ID and Client Secret:
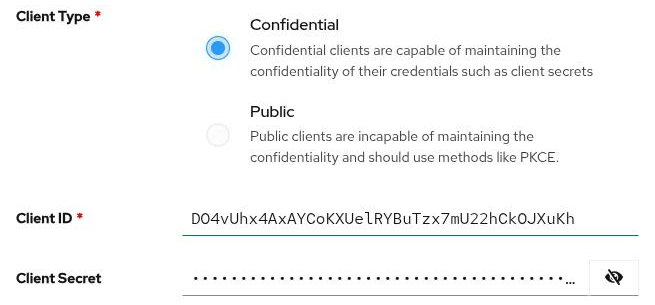
Confidential is the default here. The app uses PKCE either way, so
switching Client Type to Public works too and leaves you nothing to
rotate — but if you accept the default, Auth__Oidc__ClientSecret is
required and the token exchange fails without it.
Then add one Redirect URI entry — mode Strict, type Authorization:
https://dmarc-analyzer.agency.tld/api/v1/auth/oidc/callbackThe list starts empty, and the mode and type dropdowns only appear once you click Add entry:
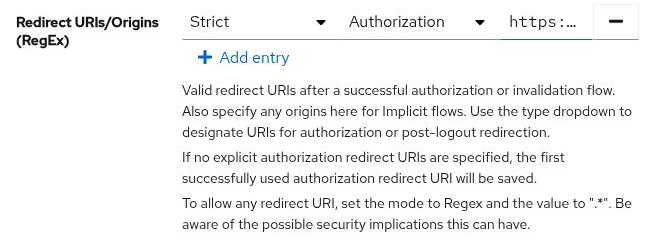
Do add one explicitly. Read Authentik’s own help text in that screenshot:
“If no explicit authorization redirect URIs are specified, the first
successfully used authorization redirect URI will be saved.” An empty list does
not fail closed — it trusts whatever redirect URI turns up first and remembers
it. Leave Strict alone as well; the alternative, Regex, is what you
would need to allow patterns, and Authentik flags the security implications of
the .* case itself.
Create the application and link it
A provider on its own is not reachable. Applications → Applications → Create, give it a Name and a Slug, and select the provider you just made.
The slug becomes part of the issuer URL, because Authentik’s issuer is per-provider by default:
https://auth.agency.tld/application/o/<slug>/That is the application’s slug, not the provider’s name. Get it wrong and discovery fails before a login is ever attempted.
If you skip or mistime the linking step, the provider list says so — and this is the easiest mistake to make, since creating the provider first feels like the whole job:

An unassigned provider still has a client ID and secret and still looks configured from the app’s side. It has no issuer, so nothing can sign in against it.
Copy the issuer and client ID
The provider’s Overview tab is where to read both. OpenID Configuration
Issuer is exactly what Auth__Oidc__Authority wants, trailing slash
included:
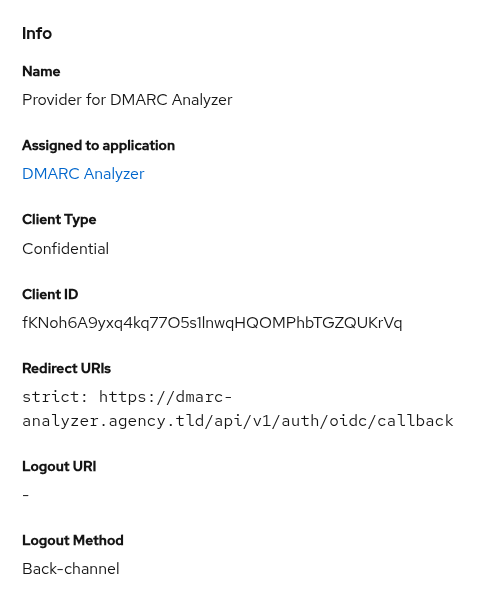
Keep the trailing slash. Authentik reports its issuer with one and the app compares the two strings exactly.
Configure DMARC Analyzer
environment:
  Auth__Oidc__Enabled: "true"
  Auth__Oidc__Authority: "https://auth.agency.tld/application/o/dmarc-analyzer/"
  Auth__Oidc__ClientId: "…"
  Auth__Oidc__ClientSecret: "…"      # omit only if you switched to a Public client
  Auth__Oidc__DisplayName: "Authentik"
  Auth__Oidc__AutoProvision: "false"
Restart and the login page gains the button. What happens on the first sign-in is the same for every provider.
Behind a reverse proxy, set
Network__UseForwardedHeaders. Without a trust list the app does not believeX-Forwarded-Proto, so it builds anhttp://redirect URI that no longer matches what you registered. See running behind a reverse proxy.
Trim the grant types
A new provider comes out with every grant type enabled — authorization code, implicit, hybrid, refresh token, client credentials, password, and device code — whichever way you create it:
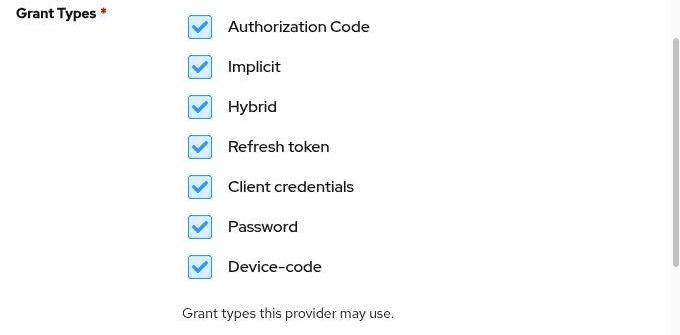
The app only ever uses the authorization code flow, plus refresh tokens. The rest is provider surface that nothing here asks for, and two are worth naming: the password grant turns your identity provider into a password-checking API, and implicit is deprecated for the same reasons the code flow exists. Untick everything except Authorization Code and Refresh token.
Troubleshooting
Discovery fails, or the app logs an issuer mismatch — the Authority does
not match the provider’s OpenID Configuration Issuer exactly. Check the slug,
and check the trailing slash.
redirect_uri mismatch — the registered URI and the one the app builds
differ, exactly and including scheme. If the app is sending http:// for an
HTTPS site, that is the forwarded-headers setting above, not Authentik.
The token exchange fails on a confidential client — Auth__Oidc__ClientSecret
is missing or stale. Either set it, or switch the provider’s Client Type to
Public.
no_account — authentication worked but no local user matched, with
AutoProvision=false. Create the account first, at the same address Authentik
holds for that user.
The button never appears — Auth__Oidc__Enabled is not true, or the app
did not restart. Check GET /api/v1/auth/providers.
Trying it locally
The repository’s development stack can start an Authentik instance for exactly
this, behind a compose profile since it is three containers rather than one,
with a walkthrough in
docs/ops/oidc-authentik.md.
Against a plain-HTTP local instance you will also need
Auth__Oidc__RequireHttpsMetadata: "false" — never in production.